Overview
This technical document provides Ax technical consultants step by step procedure of executing Ax3.0 to Ax2009 data upgrade. It also suggests some steps which can be followed for enhancing the data upgrade performance.
System configuration
Following system configuration has been followed throughout the upgrade process and the time mentioned is according to this benchmark system. This is not the required system configuration for Ax2009, for this see Ax2009 documentation:
· OS: Windows 2003 server R2, Enterprise x64 edition, Service Pack 2
· Processor: Intel Xeon CPU, 2.66 GHz
· Memory: 8.00 GB RAM
· Ax 3.0 DB size is 7083.56
Security rights needed
User performing data upgrade process must have Administrative rights.
Process
Step 1
· Backup of Ax 3.0 DB (7083.56 MB) – 5 Min
Step 2
· Import two XPOs for preparing Ax 3.0 for data upgrade. a) UpgradeColumnList.XPO, for 32 bit to 64 bit field (RecId) conversion. – 1 Min
b) LeftJustified.XPO, for removing any trailing spaces from fields.
Note: For performance point of view, one can choose to run this directly on the Ax 2009 DB. We will run this script after converting (AxDbUpgrade.exe) Ax 3.0 DB to Ax 2009 DB but before starting the Ax 2009 AOS. For now just run LefJustify.xpo (Main job), click on “Display Command” button and copy commands to text file.
Step 3 (Optional)
· For performance. Purge all user data and logs of Ax 3.0. For example SysDatabaseLog table.
Step 4
· Create an empty DB for Ax 2009 in SQL Server 2005 (Target System). For performance (optional):
a) Set initial data and log file size so that they don’t increase while we do data upgrade.
b) Set recovery model to Simple.
Step 5
· Run AxDbUpgrade.exe. For performance, you can run this in multithreaded mode:For example to run this tool in 10 threads: from the command prompt run this command AxDbUpgrade.exe P/10
In our test scenario we have both Ax 3.0 DB (Source) and Ax 2009 (Target) on the same machine. Running this tool from network may hit performance.
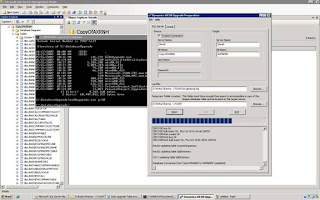
Important: The major change in this tool is if an error occurs while running AxDbUpgrade, you can continue after rectifying the error. The tool will continue where you left. J
Step 6
Run LeftJustify script saved in step 2 on the Ax 2009 DB (Step 4). We can split this file in multiple parts and can utilize the IO capacity of the system.
Step 7 (Optional)
Now our Ax 2009 DB is ready to be upgraded. So, take backup of this newly created DB.
Step 8
Run Ax 2009 setup file from the CD to start upgrade checklist. Select Database Server (choose the DB created in step 4), Application and AOS for installation. Don’t choose AOS to start.
Step 9
Copy upgraded *.AOD (your custom layers only) files from the Ax 2009 (Code upgrade environment) to this new Ax 2009 DB upgrade environment’s application directory.
Start the AOS.
Step 10
Open Ax 5.0. Upgrade checklist will come up with the steps to be processed in Ax for data upgrade.
a) Compile Application
b) License Info
c) Pre-synchronize
d) Synchronize database
e) Pre-synchronize
f) Configure system accounts
g) Finalize Enterprise Portal upgrade
h) Upgrade additional features
Step 11
Test the data.
No comments:
Post a Comment